Wednesday, May 28, 2014

What Xamarin 3 means to the future of Mobile Development


It was just a few hours ago that Xamarin release Xamarin 3.  With this announcement they have yet again revolutionized the way we write cross-platform mobile applications.

The announcement first highlights the Designer for iOS, which is awesome, but I want to take a step forward, and instead talk about what I think Xamarin.Forms will do for your future mobile development efforts.

Some background: For the last few months my company worked and developed an internal MVVM framework that provides services such as Navigation, Bindings,  Loosely-coupled messaging, mobile optimized Dependency Injection, List Controls for effortless displaying data, etc.  to be used in our projects because we believe these are things that real apps need, and what was available at the time did not fit our style of MVVM development,  so we rolled our own. Were were in the process of rolling out support for Windows Phone and were very excited to what we would be able to accomplish with this newly created framework when creating apps for all 3 platforms.  

While you might think that today's announcement would be annoying, or bittersweet to us, it is quite the contrary. We no longer have to maintain and evolve our framework, and instead we can focus on applying all we learned while creating this -yet to be named- framework, and instead extend (if needed) what Xamarin has just rolled out.

Sample UI on all 3 Platforms.
One of the immediate advantages of Xamarin.Forms over other frameworks (including our own) is that these services work on not only on the two (iOS and Android) but 3 mobile platforms (Windows Phone), and it promises the ability to achieve the quintessential  100% Code sharing.

"That's not something new" - You might say; and I would have to agree with you. MVVMCross (the most well known mvvm framework in the Xamarin ecosystem) does that.  But where Xamarin.Forms has no comparison is, in that  it attempts (and in my mind succeeds)  to bring XAML one step closer to being in all the mobile platforms (Something Microsoft just recently started doing).

XAML in itself is might not sound like a big win for seasoned iOS and Android developers, but think for a moment in the millions of developers who are already familiar with Microsoft technologies and UI creating in WPF, Silverlight and WP8. These guys already are already familiar with constructs such as Page Based UIs, Navigation Services, Two-way Bindings,  Data Templates, etc.

I invite you not just to believe me, and go try it yourself. The framework is already available today and let me know how awesome it it!!


Tuesday, May 27, 2014

Lo que Xamarin 3 significa para el futuro de desarrollo móvil


Hace pocas horas que Xamarin lanzó oficialmente Xamarin 3. Con este anuncio acaban de una vez más revolucionar la forma en que escribimos aplicaciones móviles multi-plataforma.

El lanzamiento primero subraya el nuevo diseñador de pantallas para iOS en Visual Studio, el cual es sorprendente, pero por ahora vamos a avanzar un paso hacia adelante para hablar de Xamarin.Forms y lo que yo pienso logrará para tus futuros proyectos de desarrollo móvil.

Información de contexto:Por gran parte del ultimo año mi compañía  desarrolló un framework interno basado en el patrón MVVM (Model, View, ViewModel) que provee servicios como Navegación, Bindings,  Loosely-coupled messaging, mobile optimized Dependency Injection, List Controls para desplegar datos facilmente, etc.  Este framework fue utilizado en varios de nuestros proyectos para clientes ya que cuando se crean apps de verdad, estos servicios son necesarios, y en aquel momento lo que estaba disponible no encajaba en nuestro estilo de desarrollo MVVM, así que creamos nuestro propio framework.  Recientemente estabamos en el proceso de implementar la funcionalidad para Windows Phone y estábamos super contentos con el potencial que tendría dicho framework para crear aplicaciones para las tres plataformas (iOS, Android y Windows Phone).

Mientras que podrías pensar que el anuncio del día de hoy es fastidioso para nosotros, tengo para contarte que es todo lo contrario. Ya no tendremos que mantener y evolucionar nuestro framework, y en su lugar nos podemos enfocar en aplicar todo lo que aprendimos al crear esta todavía-no-nobrada librería (y extender la de Xamarin, en caso de necesitarse).

Una de las ventajas imediatas de Xamarin.Forms sobre todas las demás librerías (incluyendo la nuestra) es la de incluye todos estos servicios para no solo las dos plataformas para los que ellos tiene productos (iOS y Android) pero también para Windows Phone, y promete la habilidad de alcanzar 100% de re-utilización de código.

"Esto no es nada nuevo" - Diría un lector incrédulo - Melvyn Perez- Y tendría que darte la razón. Ya existen librerías que logran traer estos servicios al eco sistema de Xamarin; MVVMCross siendo la más conocida. Pero donde Xamarin.Forms se "come los bizcochitos" (modismo Dominicano que significa ser superior) es en el hecho de que logra traer a XAML un paso más cerca de estar presente en todas las plataformas móviles. Algo que Microsoft ha estado empujando desde hace tiempo y recientemente ha logrado en la plataforma Microsoft con Universal Apps.

XAML per se no suena como un gran logro si eres un developer de iOS y/o Android, pero toma un momento y piensa sobre los millones de desarrollador@s que ya están familiarizados con tecnologías Microsoft para crear Interfaces de Usuario (UI por sus siglas en Inglés) en WPF, Silverlight y Windows Phone. Est@s developers ya tienen mucha experiencia con conceptos como Pages, Navegación, Bindings, Data Templates y otros.

Yo los invito a que no me crean y los traten por ustedes mismos. El framework ya está disponible  hoy. ¡¡Me dejan saber lo formidable que es!!!

Versión traducida del articulo original en inglés.

Sunday, October 27, 2013

Creating Netflix-like UI for iOS with Xamarin.iOS and Nuclios

A Xamarin.iOS version of the XCode-based sample Creating a Netflix style iOS Grid with C#, Xamarin.iOS and NucliOS by Stephen Zaharuk.


While checking out my usual late afternoon reading stream (using Flipboard), I found this great article on how to put together a very sexy UI utilizing Infragistics's iOS Controls; it instantly occurred to me that this would be a great idea for an article. It was almost muscle memory, because I found my hands spinning a browser window open to my favorite Search engine - Bing.com - and typing the keywords "Nuclios Monotouch Bindings". To my surprise the product already ships with Xamarin.iOS bindings out of the box.
Innovative Functionality Meets iOS Familiarity
Take advantage of a powerful API that is familiar to all iOS developers. You can use NucliOS controls in native iOS projects built with Objective C and Xcode. You can even build in C#; with Xamarin.ioS support, NucliOS includes final MonoTouch bindings for all of our iOS controls.
And so the journey begins. Steve has done a great job of explaining in detail the implementation, so I won't bore you with the details. Instead I will highlight what things to keep in mind when "translating" code developed with XCode and Obj-C to the stuff dreams are made of (C# and Xamarin.iOS).
// Obj-C Implementation of the model 

@interface NetflixData : NSObject
       @property (nonatomic, retain)NSString* category;
       @property (nonatomic, retain)NSMutableArray* media;
       @property (nonatomic, assign)CGFloat scrollPosition;
@end 
1-Remember to add the [Export()] Attribute to your properties in your NSObject derived classes. This will allow the under-laying native implementation to use the properties of your Data Model.
public class NetflixMedia: NSObject
    {
        [Export("ImageUrl")]
        public string ImageUrl {
            get;
            set;
        }

        [Export("Title")]
        public string Title {
            get;
            set;
        }

        [Export("Genre")]
        public string Genre {
            get;
            set;
        }
    }
2 - Use the WeakDelagate property WeakDataSource
 //NucliosViewController.cs  - Obj-C
 _gridView.WeakDataSource = _ds;
...
Instead of..
//NucliosViewController.m  - Obj-C
_gridView.dataSource = _ds;
...
3- When creating creating overloaded constructors, remember to extract any initialization code to a separate method, so you can call it (and don't try to code on an empty stomach).
public class MediaCell:IGGridViewCell
{
    public MediaCell (string identifier): base(identifier)
    {
        Init ();
    }
4- This is not a required thing, but If you find something that just doesn't make sense to "translate" and you can make it better, then do it. That's the case of the code used to consume iTunes Web services. I wasn't going to simply translate line by line.
//Obj-C +(NSMutableArray*)generateData { NSMutableDictionary* mediaLookup = [[NSMutableDictionary alloc]init]; NSMutableArray* netFlixData = [[NSMutableArray alloc]init];
NSString* rootUrl = @"https://itunes.apple.com/search?term=%@&media=movie&entity=movie&limit=600&attribute=releaseYearTerm";

NSArray* keys = @[@"2012", @"2013"];

for(NSString* key in keys)
{
    NSURL* url = [NSURL URLWithString:[NSString stringWithFormat:rootUrl, key]];

    NSData* data = [NSData dataWithContentsOfURL:url];
    NSDictionary* json = [NSJSONSerialization JSONObjectWithData:data options:NSJSONReadingMutableContainers error:nil];
    NSArray* results = [json valueForKey:@"results"];

    if(results != nil)
    {
        for(NSDictionary* mediaInfo in results)
        {
            NSString* genre = [NSString stringWithFormat:@"%@", [mediaInfo valueForKey:@"primaryGenreName"]];

            NSString* url = [mediaInfo valueForKey:@"artworkUrl100"];

            MediaItem* media = [[MediaItem alloc]init];
            media.title = [mediaInfo valueForKey:@"trackName"];
            media.imgUrl = [NSURL URLWithString:url];

            MediaData* nfd = [mediaLookup valueForKey:genre];
            if(nfd == nil)
            {
                nfd = [[MediaData alloc]init];
                nfd.genre = genre;
                nfd.media = [[NSMutableArray alloc]init];
                [mediaLookup setValue:nfd forKey:genre];
                [netFlixData addObject:nfd];
            }

            [nfd.media addObject:media];
        }

    }
}


return netFlixData;
//C#
async Task> GetData () { var movies = new List (); var url = "https://itunes.apple.com/search?term={0}&media=movie&entity=movie&limit=600&attribute=releaseYearTerm";
        var client = new HttpClient ();

        var response = await client.GetAsync (string.Format (url, "2013"));
        var stringData = await response.Content.ReadAsStringAsync ();
        var json = JsonObject.Parse (stringData);

        var results = json["results"];

        foreach(JsonValue movie in results)
        {
            movies.Add (new NetflixMedia(){
                Title = movie["trackName"],
                ImageUrl = movie["artworkUrl100"],
                Genre = movie["primaryGenreName"],
            });

        }
        return movies;
    }

Our UI

Netflix  UI


Netflix

Wednesday, May 15, 2013

Creando un UI como la de Netflix para iOS con C#, Xamarin iOS y NucliOS


Este articulo es una adaptación del articulo en inglés "Creating a Netflix style iOS Grid with C#, Xamarin.iOS and NucliOS".
Repositorio en Github.
Mientras me relajaba un poco, leyendo un poco de mi lista de lectura (via Flipboard), encontré este interesante articulo de como crear una Interfaz de Usuario utilizando la libreria INucliOS de Infragistics. Casi instantaneamente se me ocurrió que sería una buena idea para un articulo a mi blog. De pronto, casi como segunda naturaleza ya mis manos se desplazaban hacia el teclado, abrieron una ventana de IE 10 y buscaron -vía Bing - por los terminos de busqueda "NucliOS MonoTouch Bindings". Para mi sorpresa, el producto ya viene con los "bindings" para Xamarin.iOS en la descarga oficial. 
Es aquí cuando comienza la travesía. Como parte del trabajo de este articulo está basado en un articulo publicado por Stephen Zaharuk, bajo el titulo "Creating a Netflix style iOS Grid", no les aburriré con los detalles; en vez, les monstraté como tomar el original y crear un UI similar en Xamarin.iOS sin mucho esfuerzo. 
Aquí están las cosas que deben de tener en cuenta cuando "traducen"  código en Obj-C y XCode al glorioso C# y Xamarin.iOS. 

// Obj-C Implementation of the model 

@interface NetflixData : NSObject
       @property (nonatomic, retain)NSString* category;
       @property (nonatomic, retain)NSMutableArray* media;
       @property (nonatomic, assign)CGFloat scrollPosition;
@end 

1- Recuerda decorar con el atributo[Export()] a las propiedades de tus objectos que derivande NSObject. Esto le permitirá a la implementación nativa usar las propiedades de tu modelo de datos.

public class NetflixMedia: NSObject
    {
        [Export("ImageUrl")]
        public string ImageUrl {
            get;
            set;
        }

        [Export("Title")]
        public string Title {
            get;
            set;
        }

        [Export("Genre")]
        public string Genre {
            get;
            set;
        }
    }


2 - Usa la propiedad WeakDelagate que se llama WeakDataSource
 //NucliosViewController.cs  - Obj-C
 _gridView.WeakDataSource = _ds;
...
Instead of..
//NucliosViewController.m  - Obj-C
_gridView.dataSource = _ds;
...
3- Cuando crees "constructores sobrecargados", recuerda extraer el código de inicialización a un metodo aparte (eso es puro sentido común), y por último no trates de escribir código con el estomago vacío, que el "Malcomío no piensa".
public class MediaCell:IGGridViewCell
{
    public MediaCell (string identifier): base(identifier)
    {
        Init ();
    }
4- Y por último, si encuentras algo escrito de forma que no hace sentido reproducirlo tal cual, luce lo que sabes y re-escribelo, y utiliza lo que está de punta (Async) y echa vainas a tus colegas.
//Obj-C
+(NSMutableArray*)generateData
{
NSMutableDictionary* mediaLookup = [[NSMutableDictionary alloc]init];
NSMutableArray* netFlixData = [[NSMutableArray alloc]init];

NSString* rootUrl = @"https://itunes.apple.com/search?term=%@&media=movie&entity=movie&limit=600&attribute=releaseYearTerm";

NSArray* keys = @[@"2012", @"2013"];

for(NSString* key in keys)
{
    NSURL* url = [NSURL URLWithString:[NSString stringWithFormat:rootUrl, key]];

    NSData* data = [NSData dataWithContentsOfURL:url];
    NSDictionary* json = [NSJSONSerialization JSONObjectWithData:data options:NSJSONReadingMutableContainers error:nil];
    NSArray* results = [json valueForKey:@"results"];

    if(results != nil)
    {
        for(NSDictionary* mediaInfo in results)
        {
            NSString* genre = [NSString stringWithFormat:@"%@", [mediaInfo valueForKey:@"primaryGenreName"]];

            NSString* url = [mediaInfo valueForKey:@"artworkUrl100"];

            MediaItem* media = [[MediaItem alloc]init];
            media.title = [mediaInfo valueForKey:@"trackName"];
            media.imgUrl = [NSURL URLWithString:url];

            MediaData* nfd = [mediaLookup valueForKey:genre];
            if(nfd == nil)
            {
                nfd = [[MediaData alloc]init];
                nfd.genre = genre;
                nfd.media = [[NSMutableArray alloc]init];
                [mediaLookup setValue:nfd forKey:genre];
                [netFlixData addObject:nfd];
            }

            [nfd.media addObject:media];
        }

    }
}


return netFlixData;

//C#
async Task<IList<NetflixMedia>> GetData ()
    {
        var movies = new List<NetflixMedia> ();
        var url = "https://itunes.apple.com/search?term={0}&media=movie&entity=movie&limit=600&attribute=releaseYearTerm";

        var client = new HttpClient ();

        var response = await client.GetAsync (string.Format (url, "2013"));
        var stringData = await response.Content.ReadAsStringAsync ();
        var json = JsonObject.Parse (stringData);

        var results = json["results"];

        foreach(JsonValue movie in results)
        {
            movies.Add (new NetflixMedia(){
                Title = movie["trackName"],
                ImageUrl = movie["artworkUrl100"],
                Genre = movie["primaryGenreName"],
            });

        }
        return movies;
    }

El resultado final


Wednesday, August 15, 2012

Código, Presentaciones y Fotos de CodeCampSDQ 2012

Me complace reportar que el evento CodeCampSDQ fué un éxito.
Gracias a todos los que contribuyeron con su granito de arena para que este evento fuese exitoso.

El evento comenzó a las 9:30 AM, y acabó a las 4:00 PM. A este acudieron 30 profesionales del desarrollo, entre ellos varios ex-alumnos del Instituto Técnico Salesiano y el Instituto Tecnológico de Las Américas.

Los temas a tratar en este primer CodeCamp fueron:

  • Desarollo de aplicaciones Web con ASP.NET MVC 4, por Alexander Matos
  • Desarrollo de aplicaciones para iOS con C# y .NET usando MonoTouch, por Claudio Sanchez


Si el widget de SkyDrive no te funciona; para ver el código, presentaciones y fotos, eche un vistazo aquí

Wednesday, February 8, 2012

How to get a job with Microsoft, Apple or Google

I recently read a very interesting article about how to get yourself noticed in the “Major Leagues” . The article is by Gayle Laakmann McDowell, who herself has worked at four of today’s big tech companies the likes of Apple, Google and Microsoft.
Here is a short version of the 9 Reasons.
  • Go to an elite school (or associate with one).
  • Intern early, and relevant to your career (knowing how to flip burgers doesn’t make you a better coder).
  • Major in something relevant.
  • Community service means: do Tech work for free, not in a soup kitchen.
  • Learn how to write (oops, that is why I could never land one of those Winking smile).
  • Be a teacher’s pet. They write good recommendation letters.
  • Be a generalist.
  • Be an entrepreneur, innovate or deliver results.
  • no one cares if you have a 4.0 GPA.
At the end of the day, make sure that whatever you do is transferable to the next step/job in your career.

Friday, December 30, 2011

MSDN Training Courses

Microsoft’s DPE Team has put together some great training courses available for download. It is always good to “sharpen the tools”, and this would be a great starting point for learning a new skill or sharpen the already developed one.

Some of the ones that caught my eye are:

  Link to Training Courses: http://msdn.microsoft.com/en-us/gg299335

Wednesday, December 21, 2011

Windows Identity Foundation Training available

[Federated] Security is no easy thing, let’s just state that out of the gate. That is why our Federated Security guru  Dominick Baier has put together a two-day course. You can get some more details  over here.

Monday, December 19, 2011

Walk-through of provisioning Identity Server v1.0


Introduction

If you have the need to use your own Identity Provider, and want to go with something light (i.e.: not ADFS), Thinktecture’s Identity Server is your product.  I have been using it for the last couple of months and I love it!! I actually added a service layer over it to enable my RP to provision users in the Identity Server (yes, I know that this is contrary to the general concept of outsourcing Identity Management, but in my scenario, trust me, it makes sense).
From the CodePlex site:
Thinktecture IdentityServer is an open source security token service based on Microsoft .NET, ASP.NET MVC, WCF and WIF.
High level features
  • Multiple protocols support (WS-Trust, WS-Federation, OAuth2, WRAP, JSNotify, HTTP GET)
  • Multiple token support (SAML 1.1/2.0, SWT)
  • Out of the box integration with ASP.NET membership, roles and profile
  • Support for username/password and client certificates authentication
  • Support for WS-Federation metadata
  • Support for WS-Trust identity delegation
  • Extensibility points to customize configuration and user management handling

Setup

UPDATE: This walk-through assumes you are setting up Identity Server in a production/QA environment, and not as a single machine/developer setup. Hence why we are setting up by using SQL Server instead of mounting the Compact database included in the App_Data directory, as well as installing the ASP.NET Membership provider DB on the DB Server.
Download source from here
Unzip the file and open the solution.
Because Identity Server (IdSvr) needs an ASP.NET membership database, we are going to set one up (if it doesn’t exist). There are some great tutorials on the web on how to do this (if you don’t already know), here is one of them.
After having installed the ASP.NET Membership database, we are going to update the connection string in IdSvr to point to said database.
The connection string file is located at  \Configuration\connectionstring.config (Below is an example)
   1:  <connectionStrings>
   2:    <add name="ProviderDB"
   3:         connectionString="Persist Security Info=False;
   4:         User ID=sa; 
   5:         password=****;
   6:         Initial Catalog=aspnetdb;
   7:         Data Source=mydbserver;"
   8:         providerName="System.Data.SqlClient" />
   9:    
  

>

To test that the connection string works, in Solution Explorer, you should select the Website project, then from Visual Studio’s menu, select Project –> ASP.NET Configuration. This will launch the ASP.NET Web Site Administration Tool.

Screen Shot 2011-12-09 at 12.17.59 PM

Screen Shot 2011-12-09 at 12.18.14 PM


Using the ASP.NET Web Site Administration Tool, proceed to create a user (i.e.: Administrator) and a roles called IdentityServerAdministrators and IdentityServerUsers. These roles are important because they allow the user created to logon to  IdSvr’s administration screen, and in the case of IdentityServerUsers, to be forwarded to the RPs upon successful login.  These roles are specified in the Constants.cs file inside of the Thinktecture.IdentityServer.Core project.

   1:   public static class Constants
   2:      {
   3:         // ....
   4:          public static class Roles
   5:          {
   6:              public const string InternalRolesPrefix          = "IdentityServer";
   7:              public const string Users                        = "Users";
   8:              public const string Administrators               = "Administrators";
   9:   
  10:              public const string IdentityServerUsers          = InternalRolesPrefix + Users;
  11:              public const string IdentityServerAdministrators = InternalRolesPrefix + Administrators;
  12:          }

imageimage

Screen Shot 2011-12-09 at 12.18.21 PMScreen Shot 2011-12-09 at 12.18.40 PM


Configuring IIS 7


Let’s proceed to configure IIS 7 to host the Identity Server website. We will need to:


  • Request a Certificate for SSL (self-signed, Domain cert or commercial). Read this tutorial
  • Setup https bindings. Go to this link, and scroll down to Create an SSL Binding.

Creating a certificate for Token Signing


The process of creating this certificate is the same as requesting a certificate for SSL. Why not just the SSL Certificate then? – May you ask?–, and the answer is:


“Using the SSL certificate for the token signing certificate will work – but this should not be the configuration you use in production. This is considered bad key hygiene.”

Source:Technet

In my case, I have requested two certificates to the Domain Certificate Authority.

***UPDATE: Make sure the certificate Distinguished Name of each certificate is different (i.e.: Don’t request two certificates with the same attributes). I ran into an issue where IdentityServer’s x509Certificate Helper could not find the right certificate because there were two certificates, and it didn’t like that.


var certs = store.Certificates.Find(findType, value, false);
 if (certs.Count != 1) 
 { 
     throw new InvalidOperationException(String.Format("Certificate not found: {0}", value));  
 }


 IISCerts


We are almost there.

Configuring Identity Server


You should be able to navigate to Identity Server’s URL. If the certificates you created are not trusted by your computer, you see this screen. This occurs if you are using a certificate issued by a CA your computer does not trust. Here is a link on how to trust the certificate.

image

You should be seeing Identity Server’s initial configuration screen.  Go ahead and customize the first two fields to match your environment, and select the certificate that will be used for token signing.

UPDATE: Make sure that the IIS Worker Process Identity has access to the Private Key of your certificates. Use the Certificate MMC for this.

image

Tada!! You have successfully configured Identity Server and should be ready to add your application as a Relaying Party (RP). You can find a tutorial on how to do that over here (scroll down to 2.Register an existing production STS).

image

Sunday, November 13, 2011

CMAP CodeCamp Slide Deck

Wow!! What an awesome experience to have participated in CMAP's CodeCamp.  
I have started the process of going from having a wealth of opinion and a lack of experience, to a more balanced mix.  I have made a mental note of a myriad of things that need to be improved, and will continue to improve the talk and gain more experience every time I do it. 
Thanks to the audience for being so patient with me and not have walked out on me.  The slides are here.

Friday, November 4, 2011

Speaking at CMAP's Fall Code Camp

It is official. I will be speaking at a local CodeCamp about Windows Identity Foundation. There are many interesting talks and the best part is that is all free. Check it out and do not miss it. 
The Central Maryland Association of .NET Professionals (CMAP) is holding its Fall 2011 Code Camp on Saturday, November 12th, 2011 at the Loyola University Maryland Graduate Center in Columbia, MD.
The Code Camp will run from 8:30am - 5:30pm with 20-25 awesome sessions covering a wide range of database, software and portal development topics. It's totally free. No gimmicks. No sales pitches. Enjoy breakfast and lunch at no charge while you mingle with your peers.


For more details click here

Wednesday, October 5, 2011

We will remember you Steve

Steve Jobs will always be in my mind. He was indeed an influential person in my life, an inspiration and a  role model. He was living proof that you can create your own destiny, without worriying too much about the path society expects you to follow to be defined as successful.
"Your time is limited, so don't waste it living someone else's life. Don't be trapped by dogma - which is living with the results of other people's thinking. Don't let the noise of other's opinions drown out your own inner voice. And most important, have the courage to follow your heart and intuition. They somehow already know what you truly want to become. Everything else is secondary." - Steve Jobs

Wednesday, September 28, 2011

Setting up Thinktecture’s Identity Server

The following tutorial assumes the reader is familiar with the following technologies/concepts:

This post is a  how to setup Thinktecture’s StarterSTS Identity Server [B1].

1. Download the Source Code from the Codeplex site [at the time of this writing, the current version is B1 Refresh] and unzip it on your local drive.

image

2) Once the Solution is opened in Visual Studio, inside of the Tools solution folder you will find a Setup project. Run the project by right clicking on it, Selecting Debug –> Start new instance.

image

3) Set the Location of the Configuration Database as shown below.

image

You can find the file called IdentityServerConfiguration.sdf inside of the App_Data folder of the Website Project.

image


4) Select the certificate that will be used for SSL Encryption. **Note: If you already have IIS setup with SSL, you most definitely want to use the same certificate. I suspect you will, because if you are installing this Identity Server you must be very familiar with the Windows Identity Foundation configuration dance.

image

5) Select the certificate that will be used for Signing (You can use the same certificate)

image

image

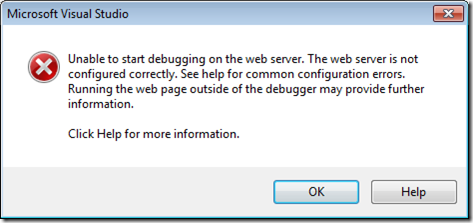
After this is done, you might be thinking that you can run the [website] project now and it should just work, right? Thought WRONG! There is no free meal in this world. Our friend Dominick [Baier] has had this running on his machine for a while, so perhaps forgot about setting up IIS, the ASP.NET provider Database and all that business.
image

SEtting up ThE WEBSITE PROJECT TO USE IIS

So, right after you download the source code, the Web Project Properties looks like so:

image

Notice the “[X] Use Custom Web Server” option is selected, and points to https://roadie/idsrv/. You want to change these setting as follows:

Switch the setting to Use Local IIS Web Server and enter a more appropriate URL (i.e.:http://[your machine’s fully qualified name]/idsrv), or if you are one cool cat, you may choose Use IIS Express (but then, you are on your own).

We are almost there, do not despair.

CONFIGURING THE ASP.NET MEMBERSHIP DB.

If you were to try to run the Website, you should get this “Yellow page of death”. And that is due to the fact (if you are one of those who do no read error pages) that the 1) you have not installed the standard ASP.NET Membership schema, and 2) the Identity under which IIS is running does not have access to said database (provided it existed). Follow these instructions to setup the ASP.NET application services schema.

image

After having installed the ASP.NET Schema on your SQL Server instance, go to SQL Server Management Studio, and under Security –> Logins, and make sure that the Identity under which your IIS Application Pool is running has a valid login in SQL Server and has the right access to the ASP.NET database. In my case, the App pool Identity is 'IIS APPPOOL\DefaultAppPool' and the database named "aspnetdb".image

image

Lastly, change the Website\Configuration\connectionStrings.config file to point to your ASP.NET application services database.

<connectionStrings>
<add name="ProviderDB"
connectionString="data source=.\sqlexpress;Integrated Security=SSPI;Initial Catalog=aspnetdb"
providerName="System.Data.SqlClient" />
<add name="IdentityServerConfigurationEntities"
connectionString="metadata=res://Thinktecture.IdentityServer.Core/Repositories.SqlCompact.IdentityServerConfiguration.csdl|res://Thinktecture.IdentityServer.Core/Repositories.SqlCompact.IdentityServerConfiguration.ssdl|res://Thinktecture.IdentityServer.Core/Repositories.SqlCompact.IdentityServerConfiguration.msl;provider=System.Data.SqlServerCe.4.0;provider connection string=&quot;Data Source=|DataDirectory|\IdentityServerConfiguration.sdf&quot;"
providerName="System.Data.EntityClient" />
</connectionStrings>


If you did everything right, you should now be able to run the application and get this page.


image


Accessing the Administration Mode of Identity Server


Out of the box, IdentityServer is configured to use the SqlMembershipProvider membership provider implementation. Therefore to login you have to:


  1. create a user (i.e.: Administrator)
  2. create a role called IdentityServerAdministrators.


Both of these can be accomplished by using the built-in Web Site Administration Tool (in Visual Studio, go to Project –>  ASP.NET Configuration).


[FYI] Contrary to what  Dominik Baier’s introductory video says [9:02] , the role the code is expecting is not “TokenServiceAdministrators”, but instead, IdentityServerAdministrators).


[Change for Improvement] This can be improved in the future by modifying the provided implementation of  ClaimsAuthorizationManager, and changing the AuthorizeAdministration Method (inside of Thinktecture.IdentityServer.Web.Security.AuthorizationManager)


protected virtual bool AuthorizeAdministration(Collection<Claim> resource, IClaimsIdentity id)
{
return (id.ClaimExists(ClaimTypes.Role, Constants.Roles.IdentityServerAdministrators));
}


The next article will describe how to create a configure your application (Relaying Party) to trust Identity Server as an Secure Token Service (STS).

Thursday, September 1, 2011

Where my data files at!?

A bit of context: As part of my team’s development workflow, we create/modify our Domain Model in code (entities such as Customer, Product, Order, etc.) and then generate the Database Model via a homegrown console app.  This allows us to  [efficiently]  code our Domain Model without having to worry about applying these changes to the lower layers of the system all the way to the database schema.

The [Schema Export] console app I mentioned automatically generates a fresh database by exploring our Domain Model – NHibernate makes this very easy - for the purpose of comparing and synchronizing with the Database Project , thus bringing our Persistence store up-to-date with our Domain Model.

The Problem: I had a need to find out the physical path was the instance of SQL Server installed on the server [c:\Program Files\Microsoft SQL Server\MSSQL10.SQLEXPRESS\] and thus were the data files for the database are placed [$SqlInstallPath\MSSQL\Data\].

The Solution:

The following T-SQL returned the path where the master database is located:

select physical_name from master.sys.databases dbs inner join master.sys.master_files files on dbs.database_id = files.database_id
where dbs.name = 'master' and type_desc = 'ROWS'


Results:

physical_name
-------------------------------------------------------------------------------
c:\Program Files\Microsoft SQL Server\MSSQL10.SQLEXPRESS\MSSQL\DATA\master.mdf
(1 row(s) affected)


And the following function takes care of removing the filename and fiving you the path:


 private static string GetDbFilePath ( SqlConnection sqlConnection, string databaseName )
        {
            string path = string.Empty;
            try
            {
                string datafilepathQuery =
                    string.Format (
                        @"select physical_name from 
              master.sys.databases dbs inner join master.sys.master_files files 
                on dbs.database_id = files.database_id
                where dbs.name = '{0}' and type_desc = 'ROWS'", databaseName );
                using ( var sqlCmd = new SqlCommand ( datafilepathQuery, sqlConnection ) )
                {
                    object datafilepath = sqlCmd.ExecuteScalar ();
                    path = datafilepath.ToString ();
                    path = path.Substring(0, path.LastIndexOf('\\'));
                }
            }
            catch ( Exception )
            {
            }
            return path;
        }


This allowed me to subsequently run another command to create the database schema at the right location. That is all for today folks!


FYI: I will be writing a post – or series of posts – on how to improve your development workflow and thus adhering to my favorite tenet of the Agile Manifesto : “maximizing the amount of work not done”.

Wednesday, June 22, 2011

Getting rid of Literal strings - part 1

In my travels around MVVM Land (specially as seen on MSFT tutorials around the net), it is commonplace to find string literals being used when implementing the , to specify the property name (as shown in the code below).

  1:     public class Customer : INotifyPropertyChanged
  2:     {
  3:         private string _firstName;
  4: 
  5:         public string FirstName
  6:         {
  7:             get { return _firstName; }
  8: 
  9:             set
 10:             {
 11:                 _firstName = value;
 12:                 PropertyChanged(this, new PropertyChangedEventArgs("FirstName"));
 13:             }
 14:         }
 15: 
 16:         #region INotifyPropertyChanged Members
 17: 
 18:         public event PropertyChangedEventHandler PropertyChanged;
 19: 
 20:         #endregion
 21:     }


But excessive use of the Copy + Paste “design pattern”, can be error prone – often times when Copying + Pasting, I forget to change the string to the new property name, and/or misspell the intended name - causing your ViewModels not to work correctly.


Solution: The guys at Microsoft Patterns & Practices  have included some nice "lifestyle enhancing” features in Prism that make your everyday coding much enjoyable. One of those features is the NotificationObject, an abstract class that implements the INotifyPropertyChanged (INPC) interface, and allows you to write code such as this:


  1: public class Customer : NotificationObject
  2:     {
  3:         private string _firstName;
  4: 
  5:         public string FirstName
  6:         {
  7:             get { return _firstName; }
  8: 
  9:             set
 10:             {
 11:                 _firstName = value;
 12:                 RaisePropertyChanged(() => FirstName);
 13:             }
 14:         }
 15:     }


Notice that Line 12 does not use a “Magic String”, but rather a lambda expression that points to the property. This gives you compile-time checking as well as refactoring with ease. some improvements could be  made (i.e.: Only raising the Property Changed event when the value changes), but I will leave that up to you.